How to Maintain Your Workplace First Aid Kit: Inspect, Sanitize, Replenish

Key Takeaways
- Clean the cabinet, not just the supplies. A cabinet opened by unwashed hands for months needs a wipe-down, no matter how fresh the supplies inside are.
- Gloves first, one shelf at a time, dry before restocking. That's the whole sanitizing routine in one line.
- Inspect monthly, sanitize every few months. Fold the deep clean into an inspection you're already doing. Clean right away after any incident involving blood.
- Write it down. The routine only survives staff changes if it's a written task with a named owner.
Maintaining a workplace first aid kit means three things: inspecting it, sanitizing it, and restocking it. Most workplaces only do the last one. Someone sees the bandages are low, orders more, and puts them on a shelf that hasn't been wiped since the cabinet went up. A cabinet opened with dirty hands for two years is a germ problem, whatever is inside it.
This guide is the middle part of a three-part series. How to Inspect Your First Aid Kit covers the first step in detail. How to Restock Your First Aid Kit covers the last. This page spends most of its time on the step that usually gets skipped, which is sanitizing.
How often should you inspect a workplace first aid kit?
Step 1: Inspect the kit
OSHA and ANSI don't set a required inspection schedule, so the timing is up to you. A good routine is to check a busy cabinet every month and never let a quiet one go longer than three to six months. Always check right after any incident where supplies were used. Monthly works for most sites because it catches items people took without telling anyone. Once the cabinet is organized, it only takes a few minutes.
- Check for expired items. Look at medications, ointments, and sterile supplies. Throw out anything past its date. For the full walkthrough on dates, see [LINK TBD: expiration article].
- Remove used or damaged items. Opened packs, half-used tubes, and anything with torn, wet, or crushed packaging comes out.
- Log the inspection. A tag or checklist inside the door shows when the cabinet was last checked and by whom.
A usable item is about more than the printed date. A sterile gauze pad is only sterile while its wrapper is whole. If the packaging is torn, punctured, water-stained, or has a broken seal, treat the item as expired, whatever date is printed on it. The same goes for boxes that were crushed or opened and taped shut.
Why does a first aid cabinet need cleaning, and how do you do it?
Step 2: Sanitize the cabinet
Sanitizing a first aid cabinet means emptying it, wiping every surface with a hard surface disinfectant, and letting it dry before anything goes back in. It matters because of who reaches into the cabinet and when. People open it at the moment they're already hurt, often with a cut they want covered fast. Before that, plenty of other people opened the same door with whatever was on their hands.
- Shared access. Every shift, every department, and sometimes visitors use the same cabinet.
- Unwashed hands. Nobody washes up before grabbing a bandage. They grab it and go.
- Dust and grime. In plants and warehouses, dust, metal shavings, and oil mist settle on shelves and packaging.
- Long gaps between uses. Some supplies sit untouched for months, collecting whatever lands on them.
Restocking fixes what's missing. It does nothing about what's built up.
What's the difference between cleaning, sanitizing, and disinfecting?
Cleaning removes the dirt you can see. Sanitizing cuts down the germs on a surface, and disinfecting is meant to kill the germs named on the product's label. For a first aid cabinet, you clean first and then disinfect. Cleaners, Sanitizers and Disinfectants: What's the Difference? explains it in more detail.
How do you sanitize a first aid cabinet, step by step?
The video below shows the whole job on a real cabinet, from putting on gloves to putting supplies back. If you've never cleaned one before, watch it first. Seeing where the dust collects makes it clear why this step matters.
[INSERT VIDEO HERE]
- Put on disposable gloves. Gloves protect you from whatever is on the shelves. They also keep your hands off the supplies you're about to put back. Take a pair from your cleaning supplies, not from the cabinet.
- Empty the cabinet. Set everything on a clean, dry surface. Keep items grouped by shelf so they're easy to put back. Pull anything you missed during inspection.
- Clear loose dirt. Brush or vacuum out dust, wrapper scraps, and anything stuck in the corners. Wiping over grime just moves it around.
- Wipe one shelf at a time. Work from the top down so dust and drips fall onto shelves you haven't cleaned yet. Get into the corners and the seams where shelves meet the walls.
- Follow the label. Every disinfectant says how long the surface has to stay wet. Check it, and don't wipe dry early.
- Let everything dry completely. Leave the door open until every surface is dry to the touch.
- Wipe the outside. The handle and latch are the most-touched parts of the whole cabinet.
- Put supplies back in their spots. Change gloves first if yours are dirty.
Why does the cabinet need to dry completely?
Most first aid packaging is paper or has a paper back, and damp paper gets weak. A sterile wrapper set on a wet shelf can soak up moisture and may no longer protect what's inside. Moisture trapped in a closed metal cabinet can also start rust along shelf edges and seams. A few extra minutes with the door open prevents both.
What about the door pouch and the door seal?
Many cabinets have a vinyl or plastic pocket on the inside of the door. It collects dust and loose items, and it gets missed because it isn't a shelf. Empty it, wipe inside the pocket, and let it dry. If your cabinet has a rubber seal around the door, wipe along it and check that it's in one piece. A cracked or loose seal lets in the dust you just cleaned out.
How often should you sanitize a first aid cabinet?
Plan a full clean at least once a quarter. That keeps buildup from settling in, and it's easy to schedule because it lines up with every third monthly inspection. You're already emptying shelves to inspect, so wiping them adds very little time. Dusty sites may need it more often. Clean right away any time blood or other body fluids get on or in the cabinet. Follow your site's bloodborne pathogens exposure control plan when you do.
What should you use to disinfect a metal first aid cabinet?
Use a disinfectant made for hard surfaces like metal and plastic. Pre-wetted wipes are the easiest choice. They don't drip onto packaging, and you can work one shelf at a time. If you use a spray, spray it onto a cloth, not into the cabinet. The label tells you which surfaces it's safe on and how long to leave it wet. Go by the label, not by this article.
What to avoid:
- Harsh or full-strength cleaners. Straight bleach and similar products can be hard on painted metal. If you use a bleach-based product, pick one made for hard surfaces and follow the label's mixing directions.
- Scrub pads and scouring powder. They scratch the paint, and bare metal can rust.
- Hand sanitizer. It's made for skin, not surfaces.
- Spraying into a stocked cabinet. Overspray lands on packaging you're trying to keep clean and dry.
If you need to stock up, the Disinfectants and Cleaners collection has hard surface wipes and sprays.
That said, this entire routine needs gloves, a disinfectant wipe, and twenty minutes. It doesn't need a purchase. Any general-purpose hard surface disinfectant already in the janitorial closet will do the job, and most facilities have one. The purchase only comes when something's missing from the cabinet.
How should you organize and restock after cleaning?
Step 3: Organize and restock
Organizing means giving every item a fixed spot, so people find things fast and you can see at a glance what's missing. A clean, empty cabinet is the easiest time to set that up.
- Group like with like. Keep wound care, burn care, eye care, and medications each in their own area.
- Put the most-used items at eye level. Bandages, gauze, antiseptic wipes, and gloves go where a hurt person can find them without searching. Bulky items go low.
- Label the shelves. Labels tell the next person where things go and make gaps easy to spot.
- Keep the layout the same every time. People learn where things are, and so does whoever checks the cabinet next month.
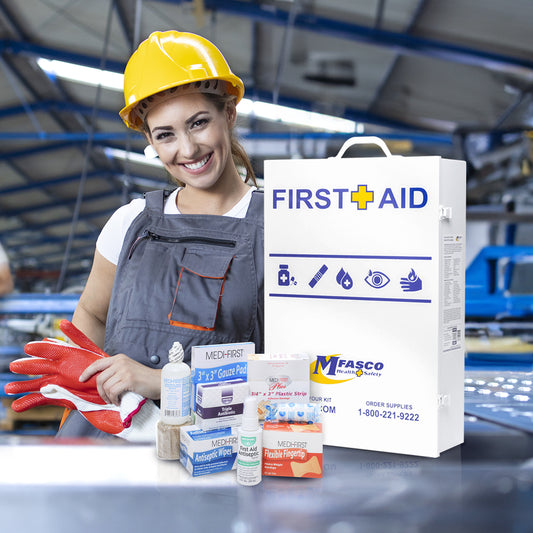
Then replace what you removed and what's been used. Most months you'll only need to reorder the few items that ran low. The complete refill pack is for a full reset, like the first time you stock a cabinet yourself. It isn't meant for every cycle. If you have an MFASCO-branded cabinet, scan the QR sticker on it to go straight to that kit's refill list.
You don't need to match the brand already on your wall. Some cabinets only take one vendor's refills, but MFASCO refills fit any standard white wall-mounted first aid cabinet.
Every complete MFASCO kit's product page has a "Refill This Kit" list that shows what the kit should hold. That list, not the refill pack, is your template. It tells you what belongs in the cabinet, so you can see exactly what's missing. For a 4-shelf cabinet, see 4 Shelf Refill for Industrial First Aid Cabinet. For the full process, see How to Restock Your First Aid Kit. To handle refills yourself across several cabinets, start at the restock hub or see workplace first aid cabinet restocking. Select MFASCO cabinets also carry the ReStockKit™ visual refill system.
As of October 2026, OSHA's first aid rule, 29 CFR 1910.151(b), says "adequate first aid supplies shall be readily available." OSHA points to the ANSI/ISEA Z308.1 standard as guidance but doesn't require a specific kit class. Our guide to the ANSI first aid standard explains what the standard covers.
Who owns this task when people change roles?
The person who owns the cabinet owns this routine. In most workplaces, though, it lives in one person's head and stops the day they leave. Make it a written task instead of someone's habit.
- Assign it to a role, with a backup. "Second-shift lead" survives staff changes. A person's name doesn't.
- Write the routine down. A one-page inspect, sanitize, and restock checklist taped inside the door is enough.
- Put it on a shared calendar. Set repeating reminders for the monthly check and the regular deep clean.
- Keep the inspection tag current. Dated initials show at a glance whether the routine is still happening.
- Hand it off on purpose. Add the checklist to the training for whoever takes over the role.
If an outside provider services your cabinets, don't assume cleaning is part of it. Restocking and sanitizing are different jobs. Whoever owns the cabinet owns the cleaning, so it's worth checking what your provider's agreement actually covers.
Contributing Expert

Mike Brinker
Mike Brinker has been working in the first aid industry for over 35 years. He has worked with thousands of businesses,groups, and organizations to provide a healthy and safe work environment. Mike helped create “Make-A-Kit”, the internet's only online first aid kit creation tool. He has also authored many helpful first-aid and safety-related resource articles found at the MFASCO Learning Center.
Top Products
-

Firstaid Kit 4 Shelf W/Fill Complete No Logo
Out of stockRegular price $282.06Regular priceUnit price per$331.84Sale price $282.06 -

Sani-cloth Plus Surface Disinfecting Wipe 160/tub
Out of stockRegular price $14.32Regular priceUnit price per$16.85Sale price $14.32 -

Super Sani Cloth Germicidal Disinfectant Surface Wipe 160/tub
Out of stockRegular price $13.72Regular priceUnit price per$16.14Sale price $13.72 -

Sanizide Plus Germicidal Wipe Each
Out of stockRegular price $1.28Regular priceUnit price per$1.51Sale price $1.28